

In Melbourne clinics, schools, and busy family homes, a quality crash mat is the quiet hero that turns big movement into safe, purposeful input. It catches swing dismounts, soaks up heavy work, and gives you a predictable way to help children find calm and body control before they sit to learn. The Crash Mat 200×150×20 cm we stock uses high-density foam for stable impact absorption and a wipe-clean PVC cover with reinforced seams – built for real-world therapy rooms and classrooms. The current price is AUD 500 (site-wide sale ended). If you need a school/NDIS quote or quick advice for your room layout, you can WhatsApp our team.
Why crash mats help children regulate
Proprioceptive input – those strong signals from joints and muscles – often settles the nervous system. When a child jumps, lands firmly, or receives steady compression, the body gets clear information about where it is in space. That clarity reduces the “buzz” of restlessness, improves confidence, and shortens the time it takes to recover from high-arousal play. In Melbourne classrooms, we see crash-mat moments used as short resets after recess, during wet-day timetables, and before handwriting or reading blocks. In clinics, the mat acts as a safe end-point after vestibular input on swings and as a consistent station in obstacle courses.
What to look for (and why the details matter)
Thickness and density work together. At 20 cm with high-density foam, the mat absorbs force without the ankles punching through to the floor. The 200×150 cm footprint is generous enough for run-ups and group rotations but still manageable in typical therapy rooms and multipurpose school spaces. A PVC cover that wipes clean in seconds is essential; Melbourne services disinfect between students all day long, and seams/zip guards protect the foam over years of use. These specs are not “nice to have” – they’re what keep sessions safe, fast, and hygienic.
Setting up a room that flows
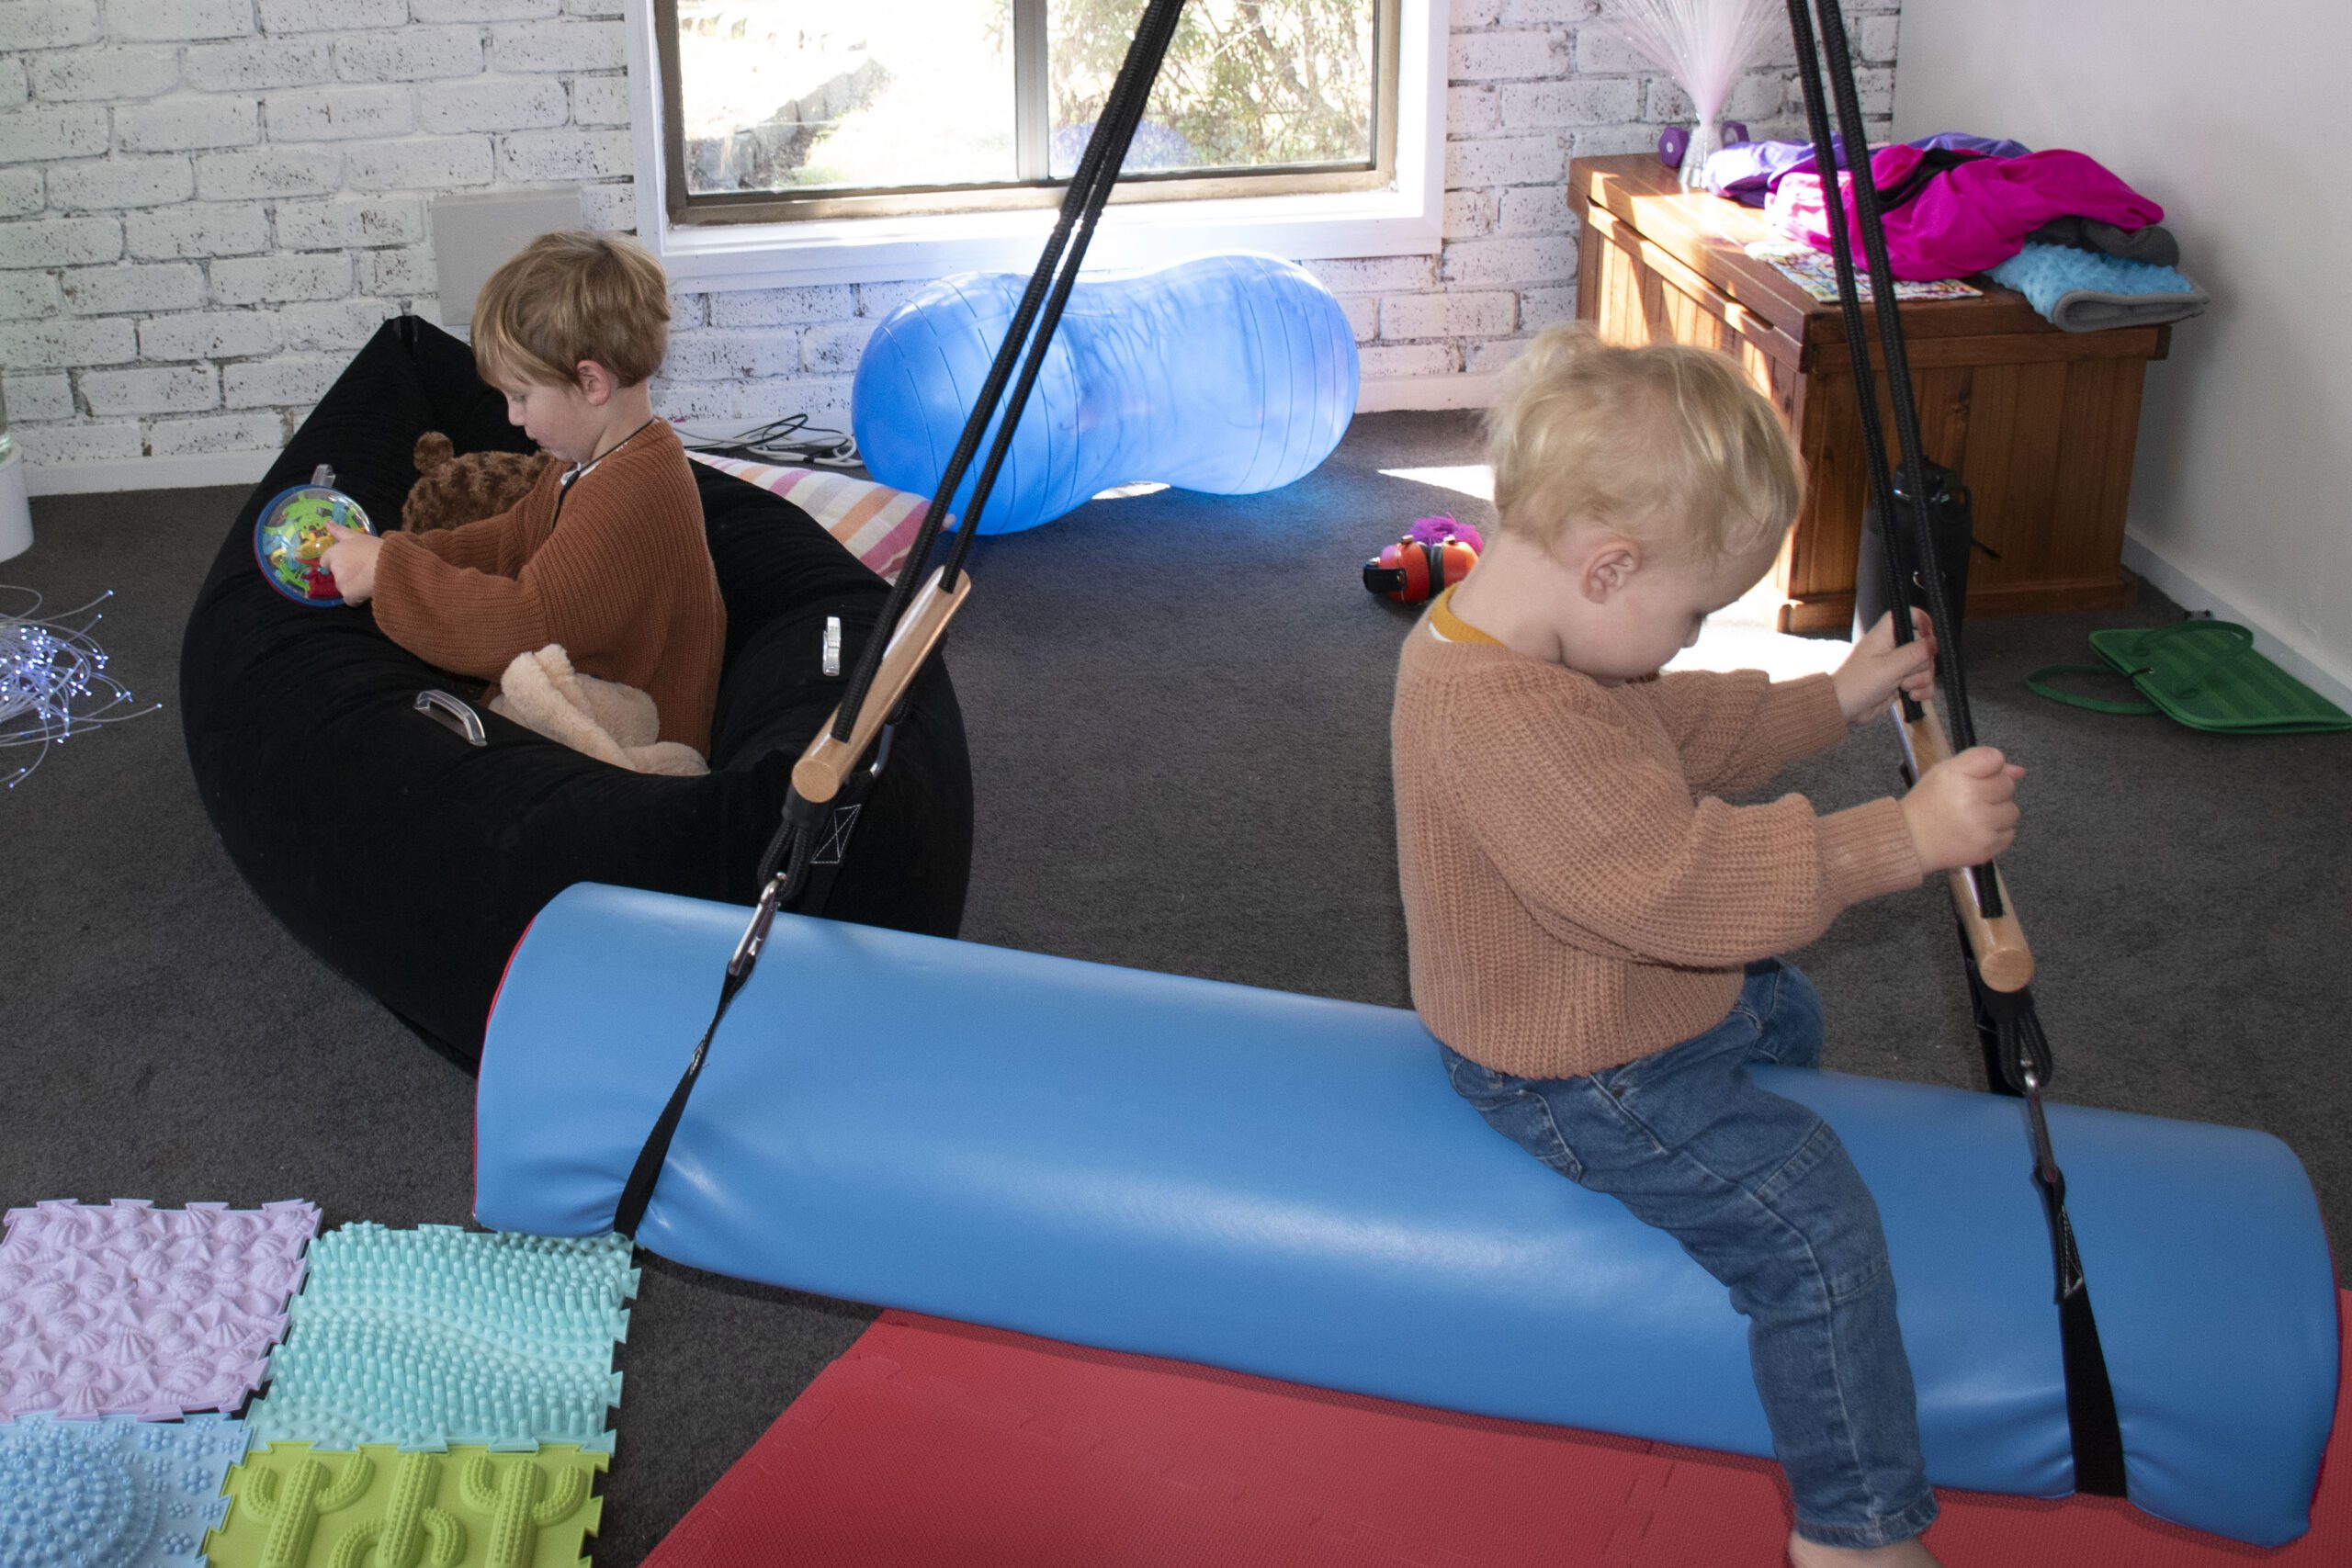
Start by choosing a clear landing zone. If your space includes swings, park the mat where dismounts naturally land. The Arch Swing challenges core control and works well when the mat sits slightly forward of the arc; the Square Flat Swing offers a broader entry point for hesitant movers. Mark a coloured dot or tape square on the mat to create a visual target and teach a simple script such as “Three swings, eyes on the dot, frog land, freeze.”
If you don’t run swings, make the mat the anchor of a short reset circuit. Cones for a quick jog, three firm wall pushes, two jumps to the mat, then thirty seconds in the Sleep Pod for compression. That small sequence is enough to take the edge off after a noisy corridor, bus ride, or rainy-day lunch. When you need a calmer finish, move from two firm “mat sandwiches” (steady, predictable pressure with a slow count) to a visual focus using the Fiber Optic Curtain or Fiber Optic Strands for two quiet minutes of “watch and breathe.” Homes can recreate the same pattern in a hallway or living room; clinics can swap elements in and out without moving much equipment.
Fifteen high-yield activities (with how, when, and what they build)
1) Target landings. Place one to three coloured spots on the mat. From a low platform, the child jumps to the chosen colour with “knees soft, hands forward.” Use early in a session after light movement. It grows motor planning, accuracy, and confidence.
2) Frog jumps. Hands touch the mat; jump feet to hands; repeat three to five times. Ideal as a whole-body warm-up before fine motor tasks. Expect better core activation and cleaner sequencing.
3) Crash and roll. Land on the tummy, log-roll off, stand, and reset. Pair with swings or scooter boards to bring arousal down. The roll ties vestibular and proprioceptive input together and builds bilateral coordination.
4) Tall-kneel drops. From a tall kneel on a low step, make a tiny hop down, then “freeze like a statue.” Use with children anxious about height. It builds eccentric control and timing.
5) Push-the-mat. Two students push the mat together for a metre or two like a sled. Great for channeling big energy in groups; it builds teamwork and heavy-work endurance.
6) Plank walkovers. The child holds a plank while an adult slowly lifts one edge of the mat so the child “walks” hands to keep level. Do a short dose before handwriting to prime shoulder stability and steady attention.
7) Mat sandwiches. Child lies prone; clinician delivers firm, even pressure through the forearms for a slow five-count; check in; repeat three times. Use before quiet visual work or reading. It’s calming and deepens body awareness.
8) Jump and call-back. Jump, land, repeat a called letter/number/word. Use as a literacy warm-up in early primary. It develops dual-tasking, auditory processing, and graded force.
9) Dismount and freeze. From the Square Flat Swing, land and hold still for two seconds. This is the simplest way to restore control after vestibular input and build inhibition.
10) Land then toss. On landing, toss a bean bag into a nearby bucket. Slot it into the middle of sessions when attention dips. It sharpens timing and eye–hand coordination.
11) Step-off heights. Step – not jump – off a low box to the mat, then gradually increase height over weeks. Use with children who need a measured confidence ladder. It refines risk appraisal and lower-limb control.
12) Bear-crawl runway. Crawl four to six metres into a controlled belly flop. Perfect when the “wiggles” peak mid-session. It builds endurance, breath pacing, and self-regulation.
13) Partner see-saw presses. Two children kneel on opposite sides, palms on the mat, and alternate gentle presses while counting together. Run it in social skills groups to practise turn-taking and graded force.
14) Number path to the mat. Lay Liquid Tiles numbered one to four, step in order, then jump and freeze. Use as a transition into a calm corner. It supports sequencing and predictability before quiet work.
15) Prone breathing. Lie on the tummy, hands under the forehead, and watch belly and ribs expand for five slow breaths – “in four, out six.” End sessions or bedtimes with this for interoception and a reliable slow-exhale habit.
What progress looks like (and how to notice it without paperwork)

Keep it plain and observable. You might see a hesitant child step off a low box without holding your hand. You might see landings hit the coloured dot and freeze for two full seconds. You may notice the “recovery window” from jump to ready-to-listen shrink from about a minute to twenty seconds. And you’ll often hear yourself prompting less – “frog land, freeze” becomes a quick nod instead of a full script. Choose two of these markers, watch them across three or four weeks, and adjust the plan only if they stall.
Coaching families for home success
Home language should be short, repeatable, and friendly: “Two strong jumps, then book time.” “Eyes on the blue dot – land like a frog.” “Crash, freeze, breathe: in four, out six.” Those tiny scripts beat long explanations at 5.30 pm when everyone’s tired. If homes are tight on space, the mat can live against a wall and drop onto the floor for five-minute routines after school.
Pairings that multiply results

Swings and crash mats are natural partners. The Square Flat Swing invites broad participation, while the Arch Swing turns up core challenge for children who are ready. For the cool-down, visual tools help brains switch gears without extra talking: the Fiber Optic Curtain and Fiber Optic Strands create a gentle focal point for “watch and breathe.” If you want a compression pairing for home evenings, the Sleep Pod is a simple, portable option.
Safety and hygiene that work in Melbourne settings
Shoes off. No sharp objects. One “go” at a time unless you’re coaching a specific partner activity. Keep a clear buffer around the mat and rotate its orientation weekly so wear evens out. Wipe the PVC surface between sessions with a mild detergent/disinfectant and let seams dry fully. Check zip guards and stitching on Fridays before pack-down; small inspections prevent big repairs.
Ready to kit out your space?
- Crash Mat 200×150×20 cm: View product
- Swings to pair: Square Flat Swing | Arch Swing
- Calm gear: Fiber Optic Curtain | Fiber Optic Strands
- Compression: Sleep Pod
- Browse categories: Sensory Soft Play | Visual Sensory | Shop All
- Need a fast clinic/school quote or a room plan for your Melbourne space? WhatsApp us
Disclaimer: The information in this blog is for general guidance and inspiration only. Sensory Beez does not provide medical or therapeutic advice. For personalised recommendations, please consult with your occupational therapist, paediatrician, or healthcare provider. Always use sensory equipment under appropriate supervision and according to safety guidelines.
